by Sharon Erdrich
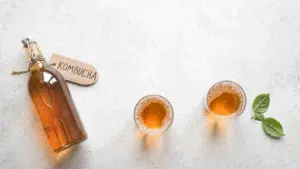
Kombucha is an “ancient fermented tea beverage” that develops a natural effervescence (fizz) that is full of probiotic bacteria and yeasts, antioxidants and other compounds.
Originally from China (with a 2000+ year history of use), Kombucha was popular in the 1970s-80s and has recently seen a revival, turning up in health food shops and trendy cafes up and down the country. So what does it taste like?
Some say it’s an acquired taste due to a tart, vinegar-like flavour. However, for me it was love at first gulp. It is refreshing, with a gentle fizz and a great alternative to soft drinks and is a great accompaniment to your meals instead of a glass of wine. And what’s best, when you make your own, you are in charge of the flavour (my fav is ginger – it’s just like the ginger beer we used to make as kids).
Making kombucha uses sugar, which is needed to feed the fermentation process. After the appropriate fermentation time, there are just trace amounts of sugar left. There are also small amounts of alcohol (around 1 – 1.25%), which is about the same as some fruit drinks, so a small amount is generally considered insignificant and seems to be safe in small amounts for children.
There are several ways to make this health-promoting beverage. Here I’ll point out the basics and include some variations. Essentially you make a sweet tea (using white, green or black tea) and allow a symbiotic colony of bacteria and yeast (SCOBY) to ferment it. The Kombucha can be bottled at this point and consumed, or set for a “second ferment” with flavouring of your choice for a few days. This invariably adds “fizz” to your brew as well.
What You Will Need
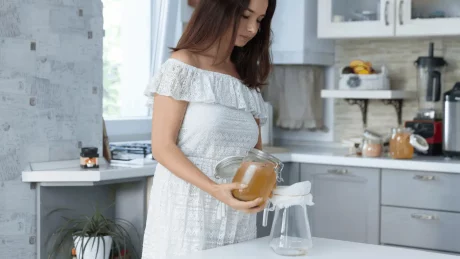
- A SCOBY
- A kettle
- Some already-made Kombucha
- Large saucepan/soup pot
- Large glass jars – at least 2L capacity.
- Bottles: collect used wine bottles or other glass bottles with caps. Or the swing-top ones. Having a couple with a wider mouth can be useful as well.
- A strainer or cheesecloth
- Kitchen towels (paper) or an old clean tea towel, cut into quarters
- Large rubber band or a length of elastic.
- A funnel
- Large Pyrex jug (optional)
- pH test paper (optional)
- Tea – loose leaf or tea bags. Do not use decaffeinated tea. I recommend using green tea as it has a milder flavour and is packed with antioxidants.
- Sugar. White or “golden” is best. Do not attempt to use other sweeteners!
- Options for flavouring (see below)
Method
Ensure all your utensils, work area and hands are clean. Measure the boiled water into your large saucepan, add the tea and sugar (see table for ratios). Stir to dissolve the sugar and cover. Allow to cool to not more than luke-warm. Strain into your jar. Add your SCOBY and the ready Kombucha. (NOTE: if you don’t have Kombucha you can use a little white vinegar as the starter) Cover with a clean cloth (eg old tea towel or paper towel) and use a rubber/elastic band to secure. This is needed because the SCOBY needs air but you don’t want fruit flies and other bugs or dust to get in. Avoid cheesecloth though, because fruit flies can sometimes get in through the mesh. Place in a not-too-hot spot and leave undisturbed for 5-7 days. TIP: if you are using tea bags, you can put the sugar, tea & boiling water straight into your glass jar if it is heat-safe.
| Water (litres) | Sugar (cups) | Tea (tsp or bags) | Kombucha | White Vinegar* |
| 1 | 1/3 | 4 | 1 cup | ½ cup |
| 2 | 2/3 | 7-8 | 2 cups | 1 cup |
| 3 | 1 | 10-12 | 3 cups | 1½ cups |
*only use white vinegar if you don’t have access to Kombucha.
Is it Ready?
Commence testing around day 7 or day 5 if the weather is really warm. Either sample it – use a clean spoon to take a little out and taste it. If you started with kombucha you’ll know the mix of sweet + tart to look for. Otherwise you can use pH strips (ones that have a good acid range). A pH of 3 will still be sweet and pH2 will be tart. Harvesting Here’s the fun part. Take your brewing jar and with clean hands lift out the SCOBY and lay on a clean plate. Strain your kombucha (tea strainer or cheesecloth) into your clean bottles. There will be some cloudy “sludge” in the bottom of the jar – don’t pour this off, leave it as part of your starter for the next batch.
Adding Flavour
A favourite is a ginger-flavoured brew that ends up tasting quite similar to ginger beer: Finely chop a 1cm x 1 cm square of fresh ginger root and pop it in the bottle. This works best if you add a squeeze of lemon or lime juice. Cap tightly and pop in the cupboard. Check daily by unscrewing the lid. Once the second ferment has commenced there will be a wee “burp”. When it is complete you will see gasses (and the ginger) rising from the bottom. Don’t let the gas out too quickly or it will foam over. Your Kombucha is now ready for drinking (strain into glasses). Or store in the refrigerator. Consume within one month.
Variations for the Second Ferment
- As above but add ¼ tsp of turmeric powder.
- 6-10 frozen blueberries or raspberries
- Chopped fresh fruit (pear, apple). About ¼ but how much is up to you.
- Fruit juice (about 10-20% by volume)
Alternative Brewing Methods
Flavouring the First Ferment
You can get a flavoured tea without a second ferment by using flavoured tea bags. The following ratios are per one litre sugar + water mix BerryUcha
- 4-5 x Green tea with Strawberry (Healtheries) teabags. Brew as above.
TropicUcha
- 4 x Green tea bags
- 1 x Tropical with Mango (Healtheries)
Continuous Brewing
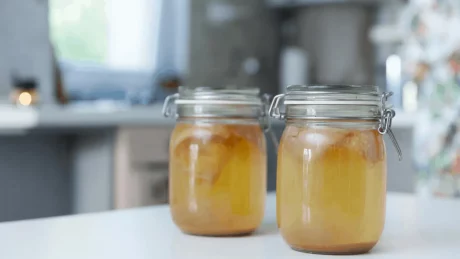
For the Serious Kombucha drinker. If you get fed up with having to wait a week or more between batches and don’t want half a dozen separate kombucha brews on the go, then continuous brewing is for you. You’ll need a vessel with a tap on it. Durant in Australia make fabulous pottery ones – they are available via Health 2000 in Masterton (Email: furryantler@vodafone.co.nz) Or you can get a glass drink dispenser (kitchen ware store). You will need to make sure it has a plastic tap, but you won’t need the lid. After cleaning your vessel (use vinegar or brewer’s sterilising powder), make your kombucha tea in the usual manner and get the brew fermenting. When it has reached the right level of tart + sweet (sampling is easy as you have a tap), bottle a litre. Top up with cooled sweet tea (just pour gently onto the SCOBY). Advantages: fresh kombucha on tap. Disadvantages: you need to make fresh tea every day. If you go away you’ll need to pretty much drain the brew, top up with fresh sweet tea and let it sit while you’re away. Eventually your SCOBY will become really thick, and the ferment can happen quite quickly. You might even need to draw off more than one litre at a time. So you’ll have plenty to share with friends!
Extra Tips
Using flavoured tea at the outset will change the colour of your SCOBY to pink. That’s OK. You can switch it back to 100% regular tea at any time.
Types of Tea
- Black tea adds bolder taste and give an amber-coloured Kombucha. It tends to give a fruity flavour reminiscent of apple cider but can vary greatly.
- Oolong tea is also amber and is somewhat fruity, grassy.
- Green tea gives a lighter colour and a grassy taste.
- Jasmine green tea makes a particularly tasty Kombucha.
- White tea makes a delicate and flowery tasting KT.
Don’ts
Do not use corn syrup, lactose, aspartame, saccharin, xylitol, lactose, or stevia. None of these sweeteners can be used as food by the culture and will be harmful to the SCOBY and will produce KT that is unsafe to consume. Do not put ginger or peppermint or other herbs/spices with strong oil/antibacterial actions in your first ferment. Similarly don’t use Earl Grey Tea. These options may antagonise your SCOBY. Avoid contaminating your SCOBY. If it goes black it has died. If it grows mould (furry stuff) throw it and the whole batch away and start again.
Normal Variations
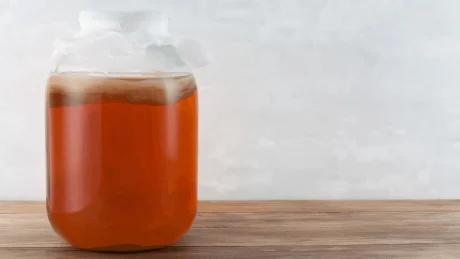
A SCOBY will last a very long time. Normal variations include holes, bumps, dried patches, darker brown patches, or clear jelly-like patches; it is still fine to use. It’s not unusual for the SCOBY to float at the top, bottom, or even sideways. A new creamy-coloured layer of SCOBY should start forming on the surface of the Kombucha within a few days. It usually attaches to the old SCOBY, but it’s okay if they separate. When you are bottling your brew you can either leave them together (they will keep growing) or separate them to start a new brew or give one away. You can also add it to your compost bin if you get overrun with SCOBYs! You may also see brown stringy bits floating beneath the SCOBY, sediment collecting at the bottom, and bubbles collecting around the SCOBY. This is all normal and signs of healthy fermentation. Even in the fridge a certain amount of fermentation continues, so don’t be surprise if wee “baby” SCOBY forms on the surface. Either swallow it (bit hit of probiotics) or add it to your main SCOBY.
Taking a Holiday?
If you’ll be away for 3 weeks or less, just make a fresh batch and leave it on your bench. It will likely be too vinegary to drink by the time you get back, but the SCOBY will be fine. You can use some of the “vinegar” as your starter. For longer breaks, store the SCOBY in a fresh batch of the tea base with starter tea in the fridge. Change out the tea for a fresh batch every 4 to 6 weeks.
Kombucha Vinegar
With time your brew will become progressively more acidic. If it went a tiny bit “past it” on the first ferment you may be able to rescue it on second ferment by adding fruit juice or a small amount of sugar (eg ½ tsp) in the bottle.
If you have a batch that went too far, remove it from the SCOBY (start your new brew as usual) and put the vinegary brew in a wide-mouthed jar. Cover with a clean cloth and leave for up to 30 days. You will have a very tasty and healthy vinegar (and a new SCOBY) at the end of that time. Kombucha vinegar is excellent for meat marinades, soaking grains (use 1 tsp kombucha per cup of water), salad dressings and so on.
Enjoy the Kombuch-goodness


